Your cart is empty
Looks like you haven't added anything to your cart yet








Best Practices for Designing Effective Window Decals
Last Updated: October 31, 2026
Quick Summary
The best practices for window decals start with the viewer's goal: decide what passersby should understand in three seconds. Measure the glass and keep the design clear of frames and edges. Size lettering to viewing distance, roughly 1 inch of height per 10 feet, and match the material to the glass and environment.
- Write a one-sentence design brief stating the audience, message and action before choosing fonts or colors.
- Measure the usable pane and keep the design at least a few inches from the edges.
- Plan roughly 1 inch of letter height for every 10 feet of viewing distance.
- Limit the design to four to six words per line for sidewalk-facing decals.
- Choose exterior-rated cast vinyl for outdoor use in direct sun and test designs at full size before ordering.
Table of Contents
- Start With the Purpose and Audience for Your Window Decal
- Measure the Window and Choose a Decal Size That Fits
- Storefront Window Decal Ideas That Work From the Sidewalk
- Window Decal Lettering Size and Readability by Viewing Distance
- Window Decal Material Options and When to Use Each
- How to Apply Window Decals Cleanly on Glass
- Plan Your Window Decal Order and Next Step
- Frequently Asked Questions
Start With the Purpose and Audience for Your Window Decal
Every effective window decal starts with a single question: what should a passerby understand in the first three seconds? Before you choose a font or a color, write down the decision you want the viewer to make, whether that is walking in, calling a number, or simply remembering your name. That goal shapes everything else on the glass.
Next, define the audience. A decal aimed at pedestrians on a busy sidewalk needs bold, short messages. A decal aimed at drivers at a stoplight can carry slightly more text, since people are sitting still for longer.
Writing a one-sentence design brief can help keep the design focused: "This window decal should tell [audience] that [message] so they [action]." If you cannot finish that sentence cleanly, the design may drift.
Measure the Window and Choose a Decal Size That Fits
Measure the glass before you design anything. Record the width and height of the usable pane, then note any frames, mullions, handles, or door hardware that will interrupt the surface.
Keep the design inside a margin of at least a few inches from the edges. Decals placed right against a frame tend to lift first, and they look unfinished. Mark the target area with painter's tape and step back across the street to check it at real scale.
Consider the interior side too. Many decals are read from inside the store by customers browsing, so confirm that the artwork still reads correctly when viewed backward from outside, and that the window does not block a sightline the staff depend on.
Storefront Window Decal Ideas That Work From the Sidewalk
Window decals succeed when they read from the sidewalk at a glance. Logo-plus-tagline layouts work well for most businesses, as long as the logo stays large enough to identify from across the street.
Seasonal and promotional decals are common and effective, but they are only useful if they are easy to remove. Choose removable vinyl for anything that will change within a few months.
For retailers with limited frontage, consider a narrow vertical strip running along the door frame. Find practical design tips for window graphics that read well from outside to plan the rest of the storefront visuals. It catches the eye of people approaching the entrance without dominating the window.
Window Decal Lettering Size and Readability by Viewing Distance
Lettering size should follow viewing distance. As a working rule, plan for roughly 1 inch of letter height for every 10 feet of distance from the viewer, then adjust for contrast and font weight.
Use a sans-serif typeface with a generous x-height and avoid thin scripts, which blur at distance. Learn how to create effective trade show signage that gets noticed for further guidance on making lettering readable from afar. Keep the number of words low.
Test readability before you order. Print the design at full size on paper, tape it to a sheet of glass or a sheet of cardboard, and check it from the actual distance a viewer would stand. Most design problems show up immediately in this test.
Color, Contrast, and Visual Hierarchy
Contrast matters more than color choice. Dark lettering on a light, transparent-looking surface, or light lettering on a dark background, will read well in most lighting conditions. Pale tones often disappear against bright sky or reflective glass, so verify them in daylight and at dusk.
Establish a clear visual hierarchy: the business name first, the key message second, and any supporting details last. Size, weight, and placement all signal importance, so use them deliberately. If everything is the same size, nothing stands out.
Limit the palette to two or three colors. Too many colors fragment attention and make the decal look busy from a distance. Mild, saturated tones usually hold up better in sunlight than fluorescent shades, which can fade quickly.
Window Decal Material Options and When to Use Each
Material choice should follow four variables: where the decal lives (indoor or outdoor), how long it must last, whether it must come off cleanly, and what kind of glass it sits on. Get those four right and the material family usually picks itself.
Opaque vinyl is the workhorse for solid-color lettering, logos, and cut graphics on clear glass. Read how outdoor sign materials are chosen for durability and weather exposure before you pick one.
Clear printed vinyl carries full-color graphics while letting light and view through.
Static-cling and removable adhesive films suit temporary promotions and renter-friendly applications. Static cling adheres without adhesive and removes cleanly, but it is less durable outdoors and can lift at edges in heat or wind.
Perforated window film is the option most guides skip. It is a perforated vinyl that reads as a solid graphic from outside while remaining see-through from inside, useful for storefronts that want full-window graphics without blocking the view out.
Match the material to the glass and environment:
- Indoor, short-term: static cling or removable adhesive.
- Indoor, long-term branding: opaque or clear vinyl with a permanent adhesive.
- Outdoor, direct sun: cast vinyl rated for exterior use; calendared film can shrink and lift at edges over time.
- Outdoor, temporary: removable exterior-rated vinyl, removed within its rated window to avoid residue.
- Full-window graphics with a view out: perforated film.
Ask your provider three questions before ordering: Is the film rated for exterior exposure, and for how long? What is the expected adhesive life under direct sun and temperature swings? Is the adhesive removable or permanent, and what removal method is recommended? The answers, not the color card, decide whether the decal still looks right a year from now.
Pro Tip
Glass type matters. Some coated, tinted, or low-emissivity windows can be damaged by certain adhesives or by heat buildup under dark film. Tell your provider what kind of glass you have before finalizing the material.
The main material families and their best uses, as covered above:
| Material | Best for | Key difference |
|---|---|---|
| Opaque vinyl | Solid lettering, logos, cut graphics | Blocks light and view |
| Clear printed vinyl | Full-color graphics | Lets light and view through; needs white underprint |
| Static cling / removable adhesive | Temporary promotions, renters | Removes cleanly; less durable outdoors |
| Perforated window film | Full-window graphics with a view out | Solid from outside, see-through from inside |
How to Apply Window Decals Cleanly on Glass
Application quality affects how a decal looks. Start with a clean, dry surface. Wash the glass with a glass cleaner, then wipe it with a lint-free cloth to remove residue, and let it dry fully.
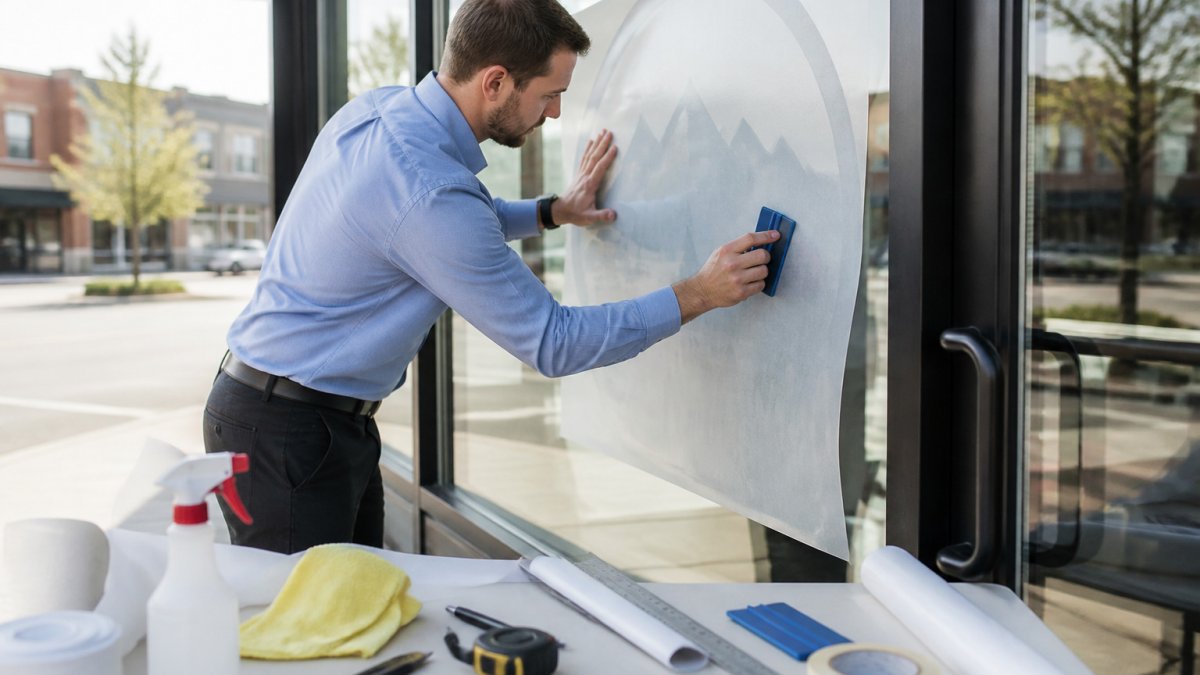
Position the decal using the transfer tape. Peel back a small section of the backing paper, align the top edge, and press it down.
Small bubbles often flatten with gentle squeegee pressure. For stubborn ones, lift the decal slightly, reposition, and reapply rather than forcing it.
Step: Clean the glass, dry it completely, and dry-fit the decal with tape before peeling the backing. Step: Apply from the center outward, squeegeeing firmly. Step: Remove the transfer tape at a low angle and inspect for bubbles.
Plan Your Window Decal Order and Next Step
Most reprints are caused by file problems, not design problems.
Artwork format. Supply vector files (AI, EPS, or PDF with live vectors) for logos, lettering, and cut graphics so they scale to any size without pixelation.
Color mode. Print production uses CMYK, not RGB.
Bleed and cut lines. For printed decals with a defined shape, add bleed (typically 1/8 inch) beyond the trim line so slight cutting misalignment does not leave a white edge. Provide cut lines on a separate layer or as a clearly marked path so the printer knows exactly where to trim or contour-cut.
White underprint layer. For clear or perforated film, specify where white ink goes, usually a separate layer behind the colored artwork.
Proof approval. Always approve a digital proof before production, and request a physical proof for large runs, brand-critical colors, or any job where a reprint would be costly.
Order checklist:
- Final dimensions, measured against the actual glass.
- Vector artwork or high-resolution raster files at print size.
- CMYK color mode and any brand color references.
- Bleed and cut lines for shaped decals.
- White underprint layer specified for clear or perforated film.
- Material, adhesive type, and indoor/outdoor rating confirmed.
- Digital proof approved; physical proof requested for critical jobs.
- Installation date and surface-preparation plan in place.
Clear files and confirmed measurements prevent most reprints. If you are unsure about any file specification, ask your provider to confirm it against the window measurements you recorded before ordering.
When you are ready, start with your measurements and design brief, then request a quote from 2mepromo.com. If you also want a related outdoor option, consider a sidewalk sign alongside your decals.
Frequently Asked Questions
What makes a window decal effective?
An effective window decal is readable from the distance a customer will actually stand, uses a clear message with few words, and contrasts strongly with the glass and what sits behind it. Lead with the business name or the single offer you want remembered, then add supporting details such as hours or a phone number in smaller text. Test the design by viewing a printed proof from across the street and at a few steps back. If the main message is clear at that distance, the decal is doing its job. If you have to read it up close, shorten the copy and enlarge the headline before printing.
How large should text be on a window decal?
Lettering size depends on how far away viewers will be when they read it. A common starting point is to size the main headline so the cap height is large enough to read from the sidewalk, then reduce supporting text in steps. Measure the viewing distance from where pedestrians and drivers will see the window, and check the proof at that distance. Keep the primary message bold and short, and avoid thin strokes or fine script for anything that needs to be read from outside. Your print vendor can confirm the minimum recommended letter height for the decal size you choose.
How do you choose the right material for a window decal?
Choose the material based on whether the decal is for the inside or the outside of the glass, how long it needs to last, and whether the window is transparent. Choose the material based on whether the decal is for the inside or the outside of the glass and how transparent the window needs to remain. Outdoor decals need materials rated for weather and UV exposure. Ask your supplier which material fits your window conditions before you finalize the artwork.
How do you apply a window decal without bubbles?
Clean the glass thoroughly with a glass cleaner and dry it so no dust, oils, or residue remain. Peel off a corner of the backing paper, align the decal carefully, and press the top edge into place. Then work from the center outward with a squeegee or a soft card, removing the backing paper as you go. Use a spray solution sparingly if the adhesive allows repositioning, and let the decal settle before you judge the result. Small bubbles often flatten over a day or two, but large ones usually mean the surface was not clean or the decal was pressed unevenly.
How long do window decals typically last?
Lifespan depends on the material, whether the decal sits inside or outside the glass, and the amount of sun and weather it receives. Interior decals generally last longer because they are protected from rain, wind, and direct UV exposure. Outdoor decals should use materials rated for exterior use, and you should expect fading or edge lifting sooner in areas with heavy sun or frequent cleaning. Check the manufacturer's stated durability for the specific material you choose, and plan to inspect and replace decals that begin to peel or lose contrast.

- Choosing a selection results in a full page refresh.
