Your cart is empty
Looks like you haven't added anything to your cart yet







How to Design Professional Event Backdrops
Table of Contents
- Event Backdrop Size Guide: Choosing the Right Dimensions
- Selecting the Right Material for Professional Event Backdrops
- Step and Repeat Banner Design Tips for Maximum Brand Impact
- Preparing Print-Ready Design Files for Event Backdrops
- Lighting, Accessibility, and On-Site Setup Considerations
- Custom Printed Table Covers for Conferences: Completing Your Display
- DIY vs. Professional Printing, and Post-Event Repurposing
- Conclusion
Last Updated: August 22, 2026
Designing professional event backdrops looks straightforward until you're staring at a blurry printout the morning of your event. At 2mepromo.com, we work with government agencies, small businesses, and event coordinators who need backdrops that hold up on camera, reinforce brand identity, and assemble without a crew. This guide covers sizing, material selection, print-ready file prep, and post-event repurposing, the exact specifications that separate a backdrop that photographs beautifully from one that ends up cropped out of every shot.
The core challenge isn't design taste. It's the gap between what looks good on screen and what survives the print process, lighting rig, and six hours of conference foot traffic.
Print Industry Association guidelines on large-format print specifications
Event Backdrop Size Guide: Choosing the Right Dimensions
Event backdrops are large-format printed displays used as photographic backgrounds and brand visibility tools at conferences, trade shows, press events, and government outreach activations. Getting dimensions right before design is non-negotiable. A backdrop sized for a 10-foot booth that ends up in an 8-foot space will either crinkle or hang awkwardly.
Standard Sizes for Step and Repeat Walls
The most common widths are 8, 10, and 12 feet, with standard height of 8 feet. An 8 x 10 configuration is most versatile for indoor events: wide enough to frame two people comfortably, tall enough to keep logos in frame for full-length and waist-up shots. For press events, a 10 x 8 or 12 x 8 wall gives photographers more horizontal room. Government agencies often use 8 x 8 panels because they fit through standard doorways.
Design your logo tiling so a 4:3 or 16:9 crop still shows clean, uninterrupted logo rows.
Matching Backdrop Dimensions to Your Booth Footprint
Most trade show booths are allocated in 10 x 10-foot increments. An 8-foot-wide backdrop fits cleanly inside a 10-foot booth and leaves room for a table without looking cramped. For 20-foot inline booths, consider two 8-foot panels or a single 16-foot tension fabric display. Booth footprint also determines hardware depth: a retractable banner stand adds 18 to 24 inches, while tension fabric sits nearly flush.

| Booth Size | Recommended Backdrop Width | Hardware Type |
|---|---|---|
| 10 x 10 ft | 8 ft | Tension fabric or step and repeat |
| 10 x 20 ft | 16 ft | Two-panel tension fabric |
| 8 x 8 ft | 7-8 ft | Economy step and repeat |
| Outdoor activation | 10-12 ft | Weighted portable display |
Selecting the Right Material for Professional Event Backdrops
Material choice determines how your backdrop performs on camera, ships, and lasts. Many buyers choose based on price alone without considering the photographic environment.
Tension Fabric vs. Vinyl: Which Performs Better on Camera
Tension fabric is the clear winner for photography-heavy events. Dye-sublimation printing onto tension fabric produces vivid, consistent color with a matte finish that eliminates glare and hot spots under event lighting. Fabric also wrinkles less in transit, hangs taut on aluminum frames, and weighs significantly less than vinyl.
Vinyl banners cost less and hold up better in wet or high-humidity outdoor conditions. For outdoor events where photography is secondary, vinyl makes sense. For a conference media wall where every attendee photographs in front of it, tension fabric is the professional standard.
The 8ft Tension Fabric Backdrop from 2mepromo.com uses lightweight aluminum hardware with dye-sublimation printing, delivering the matte finish and color accuracy cameras need without setup complexity.
Indoor vs. Outdoor Material Considerations
Indoor backdrops live in controlled environments with predictable lighting and stable temperature. Tension fabric and economy fabric step and repeats perform reliably.

Outdoor backdrops face UV exposure, wind, and moisture. Look for reinforced grommets, weighted base hardware, and UV-resistant ink. Matte finishes outperform glossy ones outdoors by reducing glare. For backdrops used in both settings, a tension fabric system with portable display structure is the most flexible investment.
Step and Repeat Banner Design Tips for Maximum Brand Impact
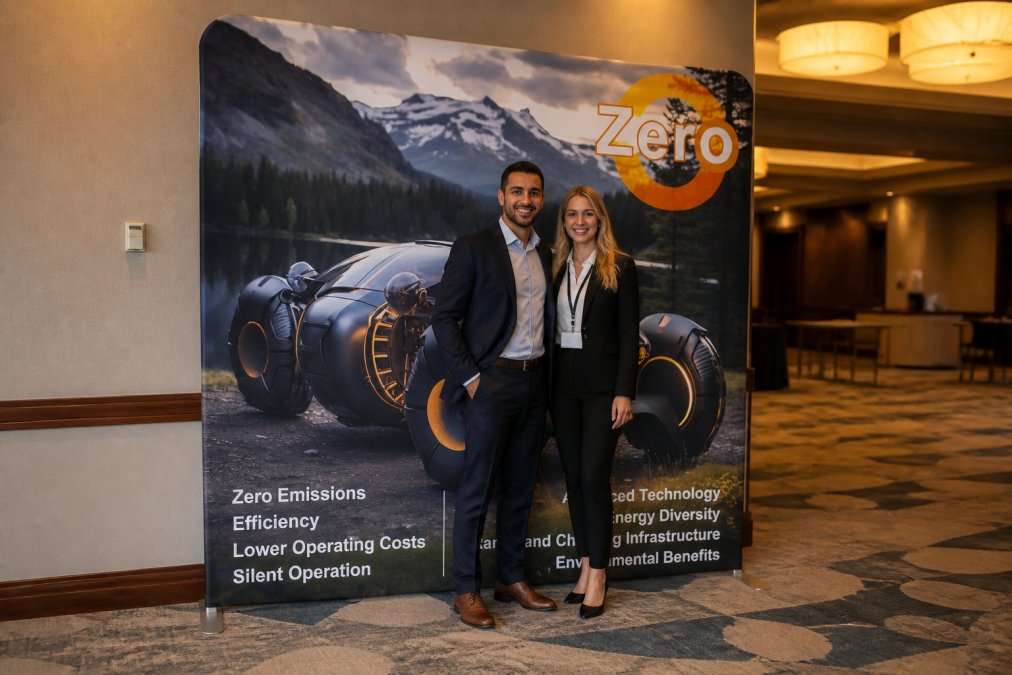
The biggest mistake in step and repeat design is treating it as wallpaper. A media wall appears in hundreds of photos and social posts, every design decision compounds across every frame.
Logo Tiling, Spacing, and Visual Hierarchy
Logo tiling follows a diagonal offset grid. Place your primary logo in rows, then offset each row by half the logo width so no two logos align vertically. This ensures that no matter how a photo is cropped, at least one full logo appears in the background.
Standard spacing between logos is roughly 1.5 to 2 times the logo's width. Too tight looks cluttered; too loose and cropped photos may show no logos. For multi-sponsor events, stack logos in tiers by sponsorship level.
Keep visual hierarchy simple: one primary logo, one secondary element, and clean negative space. A backdrop that tries to communicate too much communicates nothing.
Color Contrast and CMYK Color Profile Setup
Color contrast makes a backdrop readable on camera. Dark backgrounds with light logos photograph cleanly. Light backgrounds with dark logos work almost as well. Mid-tone combinations, a medium blue background with a navy logo, look indistinct under any lighting.
All files should use CMYK color profile, not RGB. RGB colors are additive (for screens) and shift when converted to CMYK for large-format printing. Set your design file to CMYK from the start. Verify that your brand's Pantone colors have accurate CMYK equivalents.
Pro Tip
Request a printed color proof before your full run if using a custom brand color. CMYK conversions of certain reds, purples, and bright greens can shift noticeably at large format sizes.
Preparing Print-Ready Design Files for Event Backdrops
Print-ready file preparation is where most design headaches originate. A file that looks perfect on a 27-inch monitor can print soft or pixelated if not built to spec.
Resolution, Bleed Area, and Vector Graphics Requirements
Large-format printing operates at lower resolution than desktop printing because viewing distance is greater. For backdrops viewed at 3 to 6 feet, 150 DPI at full size is sufficient. At 10 feet or more, 100 DPI is acceptable. Set your document to actual print dimensions, not a scaled-down version.
Bleed area adds a buffer zone so edge elements don't get cut off. Standard bleed for large-format prints is 0.5 to 1 inch on all sides. Keep logos and text at least 1 inch inside the safe zone.
Use vector graphics for all logos and text. Vector files (AI, EPS, or PDF with embedded vectors) scale to any size without quality loss. Rasterized logos will print with visible pixelation.
According to the Specialty Graphic Imaging Association's large-format print standards, consistent file preparation is the single most preventable source of print quality issues in event signage.
Watch Out
Never submit a file sized at 1/4 scale with "scale to 400% at print" instructions. Always submit artwork at actual output dimensions.
Lighting, Accessibility, and On-Site Setup Considerations
Lighting setup directly affects how backdrops photograph. The standard approach for media walls is two softbox or LED panel lights positioned at 45-degree angles, roughly 6 to 8 feet from the surface. This eliminates harsh shadows while keeping the background evenly lit.
Avoid placing backdrops directly under overhead fluorescent lighting, which creates hot spots on glossy surfaces. Side lighting produces better photographic results.
Accessibility matters significantly. The Americans with Disabilities Act ADA Standards for Accessible Design sets clear requirements for event spaces. Hardware bases must stay within the display footprint and not obstruct accessible pathways. Ensure the floor area in front of the backdrop is level, clear of trip hazards, and wide enough to accommodate a wheelchair.
Backdrop hardware assembly varies by system. Tension fabric frames typically assemble in 10 to 20 minutes with no tools. The SEG Pop Up Lightbox Display from 2mepromo.com adds LED backlighting, creating a self-illuminated display that reduces dependence on venue lighting.
Key Takeaway
A self-illuminated backdrop like an SEG lightbox eliminates the biggest variable in event photography: inconsistent venue lighting. For regular events in different venues, the lighting consistency justifies the investment.
Custom Printed Table Covers for Conferences: Completing Your Display
A backdrop without a matching table cover is a half-finished brand statement. Event branding works as a system: the visual engagement your backdrop creates at distance is completed by the table cover attendees interact with up close.
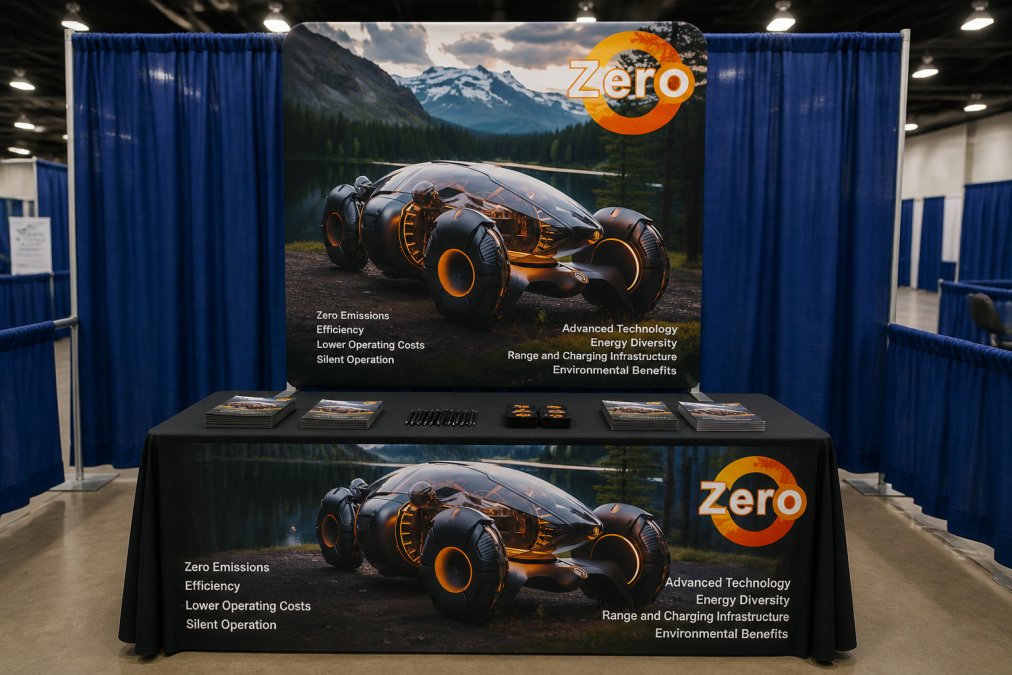
Custom printed table covers serve a practical function beyond aesthetics. They conceal storage boxes, power strips, and equipment stowed under the table, keeping your booth looking intentional. For government agencies and small businesses with limited booth staff, a clean table setup signals professionalism.
The most effective table covers match your backdrop's color palette and include your primary logo at a scale readable from 10 feet. Stretch-fit covers stay taut throughout a full event day, while throw-style covers work better for irregular table sizes.
Coordinate your table cover, backdrop, and banner stands into a unified visual system. When all elements share the same CMYK color values and brand standards, the booth reads as deliberate and professional.
![[Prime] Indoor Slider Banner Stands](https://cdn.shopify.com/s/files/1/0712/7492/2209/files/ONE-CHOICE-Slider-Banner-Stands_Graphic_20Package-10x7.5_20ft-01.jpg?v=1785099567)
DIY vs. Professional Printing, and Post-Event Repurposing
The DIY vs. professional printing decision comes down to one question: what is your time worth, and what is the cost of a failed print? Many coordinators attempt to produce backdrops through consumer print services to save budget. Results are usually unusable for press events or high-visibility brand activations.
Professional large-format printing with dye-sublimation on tension fabric produces color accuracy, edge-to-edge consistency, and durability that consumer alternatives cannot match. The 8 x 10 economy fabric step and repeat from 2mepromo.com offers professional-quality output at an accessible price point.
Post-event repurposing extends your backdrop's value:
- Photography studio background: Serves as a permanent background for headshots, product photos, and video content.
- Office installation: Tension fabric displays can be repurposed as semi-permanent wall graphics in reception areas or conference rooms.
- Virtual event background: A physical backdrop behind a desk creates a consistent visual for video calls and recorded presentations.
- Modified for new events: Fabric panels can be reprinted with updated branding while reusing existing aluminum hardware.
Budget-conscious organizations should factor repurposing potential into the initial investment. A $325 economy step and repeat that serves five events and doubles as an office installation delivers fundamentally different return than a single-use display.
Event Marketer's guide to trade show display ROI and reuse strategies
Designing professional event backdrops requires coordinating decisions across sizing, materials, file preparation, and on-site setup. A mistake in any one area undermines the rest. 2mepromo.com offers tension fabric backdrops, economy step and repeat systems, and SEG lightbox displays built for the environments government agencies and small businesses operate in: variable venues, limited setup time, and a need for consistent brand identity across every activation. Explore the full backdrop catalog and add the right display to your next event order.
Frequently Asked Questions
How do I choose the right size for a step-and-repeat backdrop?
The most common step and repeat sizes are 8 ft x 8 ft and 8 ft x 10 ft. An 8 x 10 format works well for most events because it fits two to three people in the frame without cutting off logos at the edges. Match the width to your booth footprint, leave at least 1 foot of clearance on each side, and confirm the height clears your tallest attendees with room for at least one full logo row above their heads.
What materials are best for indoor versus outdoor event backdrops?
For indoor events, tension fabric with dye-sublimation printing is the top choice. It produces vibrant color, eliminates glare under event lighting, and packs down to a compact carry bag. For outdoor use, vinyl banners handle wind and moisture better, though they can create glare in direct sunlight. If you need a display that moves between indoor and outdoor settings, a matte-finish tension fabric on a sturdy aluminum frame is the most versatile option.
What are the most common mistakes when designing event backdrops?
The most frequent mistakes are submitting low-resolution files (anything under 100 dpi at full print size), forgetting to convert colors from RGB to CMYK, and placing logos too close to the edge without a bleed area. Designers also often crowd the layout with too many elements, which reduces visual impact in photos. Keep the design to your logo, brand colors, and a clean background, simplicity photographs better and reinforces brand consistency across every image taken at the event.
What is the average cost for custom-printed event backdrops?
Pricing varies by size, material, and hardware. An economy fabric step and repeat backdrop starts around $325, while a tension fabric backdrop with aluminum hardware runs approximately $425. Backlit SEG lightbox displays, which add visual engagement in low-light venues, start higher, around $1,500. DIY fabric options cost less upfront but often require more prep time and produce lower print quality than professionally printed dye-sublimation displays.
This article was written using GrandRanker
- Choosing a selection results in a full page refresh.
