Your cart is empty
Looks like you haven't added anything to your cart yet









How to Incorporate Digital Screens Into Event Backdrops
Quick Summary
Digital screens work best when they fit the venue, audience and sightlines, so start by measuring the stage and walking the room. Then choose a screen type, such as LED panels, LCD panels or modular lightbox systems, based on viewing distance, brightness and setup effort. Test brightness and glare under real event conditions before you commit.
- Measure stage width, depth and ceiling height before choosing a screen size.
- Smaller LED pixel pitch allows a closer comfortable viewing distance.
- Stages under 10 feet wide typically need one or two panels.
- Confirm the circuit can carry the full power draw with headroom to spare.
- Build a one-page setup sheet covering power, signal, rigging and playback backup.
Table of Contents
- Start With the Venue, Audience and Sightlines
- Choosing the Right Screen Type: LED, LCD and Modular Panels
- Sizing and Configuring Screens for Your Stage
- Planning the Content Your Screens Will Play
- Designing a Digital Screen Backdrop Ideas Layout That Blends With Physical Décor
- Event Stage Screen Setup: Installation, Power and Glare Control
- Trade Show Digital Display Best Practices and a Pre-Show Checklist
- Booking Your Screen-Backed Display With 2mepromo.com
- Frequently Asked Questions
How to Incorporate Digital Screens Into Event Backdrops
Last Updated: November 1, 2026
Start With the Venue, Audience and Sightlines
Digital screens can turn a plain event backdrop into a focal point, but only when they fit the room. Those three answers shape nearly every decision that follows.
Walk the space before you buy anything. Note the ceiling height, the stage depth, and where attendees will stand or sit. Check for pillars, columns, and sightline blockers that could hide part of the display.
- Measure the stage width and depth
- Note the ceiling height and rigging points
- Mark the spots where the most people will watch from
- Identify the nearest power outlet and network access
A common mistake is choosing a screen size based on how it looks in a product photo. Stand in the back row and imagine what your audience will actually see.
Choosing the Right Screen Type: LED, LCD and Modular Panels
The right screen type depends on the venue, the viewing distance, and the budget. The decision often comes down to four specifications: pixel pitch, brightness, resolution and aspect ratio.
LED panels. An LED wall is built from tiles, and each tile is rated by pixel pitch, the distance in millimeters between individual LEDs. A smaller pitch means a denser image and a closer usable viewing distance. As a rule of thumb, the minimum comfortable viewing distance in feet is roughly the pixel pitch in millimeters divided by 0.3, so a 2.6mm wall is readable from about 9 feet and a 3.9mm wall from about 13 feet. LED walls are the brightest option, commonly rated in the 1,000 to 5,000 nit range for indoor use, which is why they hold up in rooms with large windows or heavy stage lighting. They are also the heaviest and most power-hungry option, and they usually require rigging approval from the venue.
LCD panels. Commercial LCD displays are measured in diagonal inches and rated in nits. They are sharp at close range, quiet, and simple to mount on a stand or truss, which makes them a good fit for smaller, controlled rooms, breakout sessions, and registration areas. The trade-off is that they come in fixed sizes and aspect ratios (16:9 is standard), so a video wall built from multiple panels needs a processor to split the signal cleanly across seams.
Modular lightbox systems. These combine a backlit graphic frame with a fabric face and sit between the two extremes. They are not video displays, they show a printed or dye-sublimated graphic lit from behind, but they give you a bright, even backdrop with low setup effort and no signal routing. The 3.3 x 8ft. SEGO Modular Lightbox Display is one example of this category. It uses LED light strips along the top and bottom to backlight dye-sublimated fabric graphics, and its tool-free frame assembly simplifies setup.

| Screen Type | Best For | Setup Effort | Brightness Control | Typical Spec to Confirm |
|---|---|---|---|---|
| LED panels | Large, bright venues; long viewing distances | High | Excellent | Pixel pitch (mm) and nits |
| LCD panels | Small, controlled rooms; close viewing | Medium | Good | Diagonal size and nits |
| Modular lightbox | Trade shows, corporate events, photo areas | Low | Good | Graphic size and frame depth |
Watch Out
A bright LED wall in a room with large windows can wash out content, and a dim LCD in a brightly lit hall can look gray. Test brightness at the actual event time of day, with the house lights at show level, before you commit.
Two more specifications matter once you move past the type decision. Aspect ratio determines how your content is framed, a 16:9 display and a 32:9 ultra-wide wall need different artwork, and stretching one to fit the other is the most common content mistake. Refresh rate matters if cameras are covering the event: a display refreshing below the camera's shutter can produce visible banding on broadcast and social video, so confirm the refresh rate with your AV vendor if the stage will be filmed.
Sizing and Configuring Screens for Your Stage
Size your screen to the stage first, then to the audience. A backdrop that is too narrow looks like an afterthought, while one that overwhelms the speaker can distract from the message.
Larger modular systems let you scale up. The 9.8 x 8ft. SEGO Modular Lightbox Display offers a wider graphic area for stages that need a bold, full-width presence.

- Narrow stages (under 10 feet): one or two panels
- Medium stages (10 to 20 feet): three to four panels
- Wide stages (over 20 feet): modular systems with multiple sections
Planning the Content Your Screens Will Play
Plan content before the event, not during it. A screen that loops the same logo for four hours becomes wallpaper. Attendees respond better to content that changes with the program.
Create a simple schedule that matches your agenda. Use motion sparingly so text stays readable from the back row. Keep headlines short and use high-contrast colors.
- Build a content calendar mapped to each session
- Use large type with no more than a few words per line
- Loop brand visuals during breaks and arrivals
- Prepare a fallback slide in case of a playback failure
Designing a Digital Screen Backdrop Ideas Layout That Blends With Physical Décor
The best digital backdrops look like part of the room, not a screen dropped into it. Combine the display with fabric, lighting, and structural elements so the whole stage reads as one design.
Blend colors and textures from your physical décor into your digital graphics. If your booth uses wood and warm light, carry those tones into the screen imagery.
Portable Light Box Fabric Display →
Digital and physical elements should support each other. A glowing edge on a fabric frame can guide the eye toward the screen without competing with it.
Event Stage Screen Setup: Installation, Power and Glare Control
Installation problems cause more event-day stress than almost anything else. This is the part most backdrop guides skip, so treat it as a checklist you work through in order: power, signal, mounting, playback, then glare.
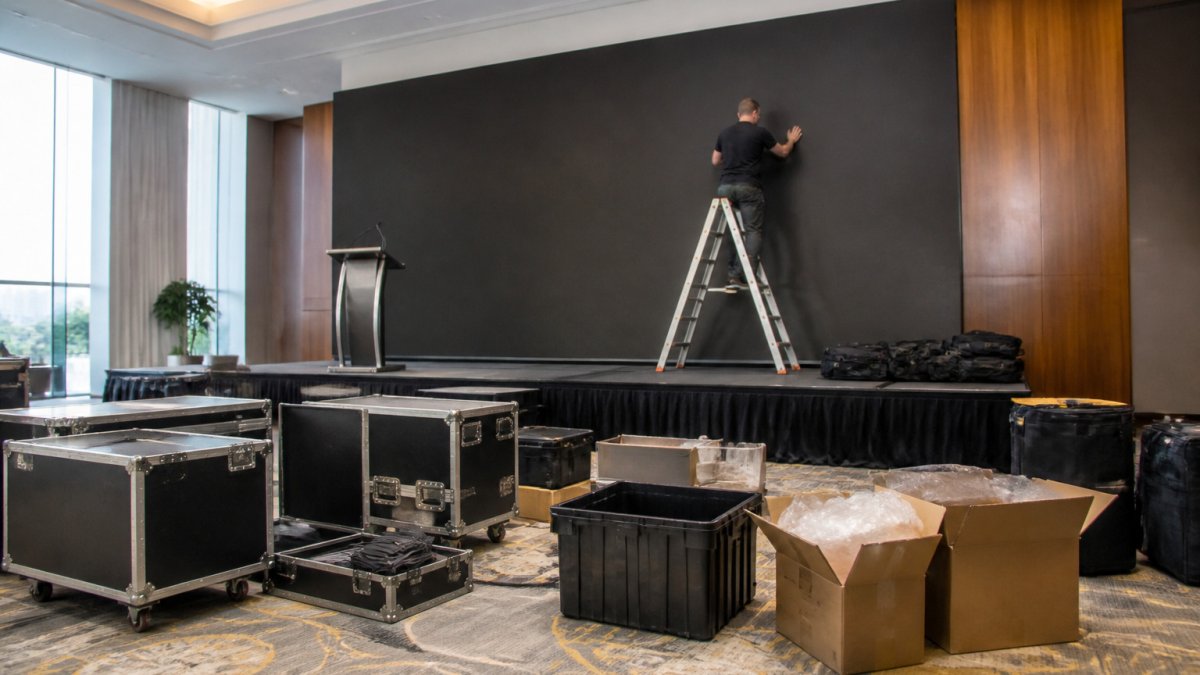
Power. Add up the draw of every screen, processor, and media player on the circuit, then confirm with the venue that the circuit can carry it with headroom to spare. LED walls and large LCD arrays draw far more than a single panel, and they should not share a circuit with stage lighting or audio. Ask the venue where the nearest dedicated circuits are, whether they are on the same phase, and whether a generator is required. Bring surge protection and label every cable at both ends so a mid-event swap is fast.
Signal routing. Map the path from your playback source to the display before load-in. A typical chain runs from a media player or laptop, through an HDMI or SDI cable, into a video processor or scaler, and out to the display. Long cable runs degrade signal, so plan for signal extenders or a fiber run over distance rather than daisy-chaining short cables. If you are driving multiple screens or a video wall, the processor handles splitting and edge blending, confirm it supports your source resolution and the wall's native resolution.
Mounting and rigging. Free-standing frames and truss-mounted panels are the two common approaches. Anything flown overhead requires rigging approval from the venue or its rigging contractor, and the approval should be in writing before load-in. Ground-supported frames avoid that approval but need ballast or weight at the base, and the ballast must be placed where attendees cannot trip over it.
Playback and backup. Run content from a dedicated media player rather than a laptop running other software. Load the show file on a second drive, keep a spare player on site, and rehearse the full sequence, including the transition between sessions, on the actual hardware. A common pattern is to build a simple playlist with a fallback slide at the end of every segment so a failure never leaves a black screen.
Glare and cable management. Glare is a common problem near stage lights and windows. Angle the screen away from direct light sources, use a matte finish where available, and test under the actual stage lighting rather than house lights. Route cables along floor edges, cover them with cable ramps or gaffer tape in high-traffic areas, and keep power and signal runs separated to reduce interference.
Watch Out
Never leave cable runs unsecured in a high-traffic area. A single trip can take down the entire display mid-event, and it is also a liability exposure the venue will flag during its walkthrough.
Key Takeaway
Build a one-page setup sheet before load-in: circuit locations and draw, signal chain with cable lengths, rigging approval status, playback source and backup, and a glare test time. Hand it to the crew lead and the venue contact so everyone works from the same plan.
Trade Show Digital Display Best Practices and a Pre-Show Checklist
Trade show screens compete with dozens of other booths for attention. Keep your message short, your visuals bold, and your setup fast.
Before the show, run through this checklist:
- Test all content on the actual display hardware
- Confirm power outlets and extension cords are on hand
- Check frame assembly and tighten all connection clips
- Pack a spare graphic panel and basic repair tools
- Verify the travel case fits your shipping or vehicle space
- Load a backup content file on a separate drive
The Portable Light Box Fabric Display is listed with a turnaround time of two business days and includes a template and specsheet for preparing graphics.

Booking Your Screen-Backed Display With 2mepromo.com
Ready to build your setup? Start by matching your stage dimensions to a display size, then choose content that supports your event goals.
Frequently Asked Questions
How do you incorporate digital screens into an event backdrop?
Start by fixing the screen size and position to the stage and sightlines, then choose a screen type that matches the viewing distance and brightness of the room. Build the frame so the screens sit flush with or frame the physical backdrop, and test how the two layers look together before the event. Plan the content in advance so the screen and fabric or printed graphics tell one consistent story. Modular lightbox frames, such as the SEGO display options in the 2mepromo.com catalog, can hold dye-sublimated graphics alongside lighting, which helps physical and digital elements read as one unit.
What type of digital screen works best for an event backdrop?
LED panels suit large, bright rooms and outdoor-adjacent spaces because they stay visible in daylight and scale well to wide backdrops. LCD screens give sharper detail at closer viewing distances and work well for smaller booths or indoor corporate stages. For display walls that need to be set up and taken down quickly, modular frames are practical because they assemble without tools and pack into travel cases. Match the choice to the room's brightness, the audience's distance from the screen, and how often the display will move.
How do you prevent glare and visibility problems on event screens?
Position screens out of direct line with overhead lighting and windows, and angle them slightly if the room has strong spotlights. Check the screen brightness at the venue during a rehearsal rather than relying on the room's empty-hall lighting. For backlit frames, confirm the LED edge lights are evenly distributed so no hot spots distract viewers. Test the display from the back and side rows, since the seats farthest from the stage are where visibility problems show up first.
What should you check before installing event display screens?
Confirm the stage load capacity, the power outlets available, and any venue rules on rigging, cable routing and fire safety. Measure the room and sightlines so the screen is visible from every seating zone. Verify that the content file formats and resolutions match the screen specifications. Prepare a backup playback device and spare cables, and schedule a full run-through with the event staff before doors open.
Get started with 2mepromo.com and bring your next event backdrop to life with a display built for easy setup and clear visibility.

- Choosing a selection results in a full page refresh.
