Your cart is empty
Looks like you haven't added anything to your cart yet







How to Order Custom T-Shirts for Corporate Events
Table of Contents
- Step 1: Define Your Event Goals and Audience
- Step 2: Choose Your Garment Style and Fabric
- Step 3: Understanding Printing Methods: Screen Printing vs. Direct-to-Garment
- Step 4: Corporate Apparel Design Best Practices
- Step 5: How to Size Corporate T-Shirt Orders
- Step 6: Bulk T-Shirt Printing Turnaround Time and Custom Logo Embroidery Options
- Step 7: Place Your Order and Manage Quality Control
- Conclusion
- Frequently Asked Questions
Last Updated: October 3, 2026
Step 1: Define Your Event Goals and Audience
Learning how to order custom t-shirts for corporate events starts with defining the specific business outcome you want these shirts to achieve. This clarity shapes every decision that follows, from fabric choice to design complexity to total budget.
Identify your primary goal. Are these shirts meant to build internal team unity during a company retreat? Promote your brand visibility at a trade show or conference? Recognize employee achievements or tenure milestones? Create a uniform look for volunteer activities or community service events? Serve as take-home merchandise that extends brand awareness after the event ends? Each goal has different implications for design, durability, and quantity planning.
Understand your audience and their expectations. Who will wear these shirts? Internal staff only, external attendees, or a mixed group? What is their typical dress code and brand familiarity? A tech conference crowd expects modern, minimal design and premium fabric feel. A nonprofit volunteer group may prioritize comfort and durability over aesthetics. A corporate retreat for executives demands higher-quality construction and subtle branding. Understanding these expectations prevents ordering apparel that misses the mark or feels misaligned with your brand positioning.
Estimate your headcount and plan for contingencies. Count how many people need shirts, then add 10-15% for replacements, unexpected attendees, and future use. This number directly drives your printing method choice (screen printing vs. DTG), bulk pricing tier, and production timeline.
Consider the post-event lifecycle of your apparel. Will attendees wear these shirts repeatedly, or is this a one-time event memento? Will leftover inventory be donated, repurposed for future events, or recycled?
Document your event details and constraints. Create a brief planning sheet that captures: event date and location, expected attendance, dress code or brand guidelines, primary goal, budget range, and any sustainability or quality requirements. This becomes your reference sheet throughout the ordering process and prevents costly last-minute changes. Share this document with stakeholders (finance, HR, marketing) early to secure internal alignment on budget and timeline before you commit to a supplier.
Pro Tip
Schedule a 15-minute planning call with your event team before contacting a supplier. Align on goal, audience, quantity, budget, and timeline. This single step eliminates 80% of order revisions and delays.
Step 2: Choose Your Garment Style and Fabric
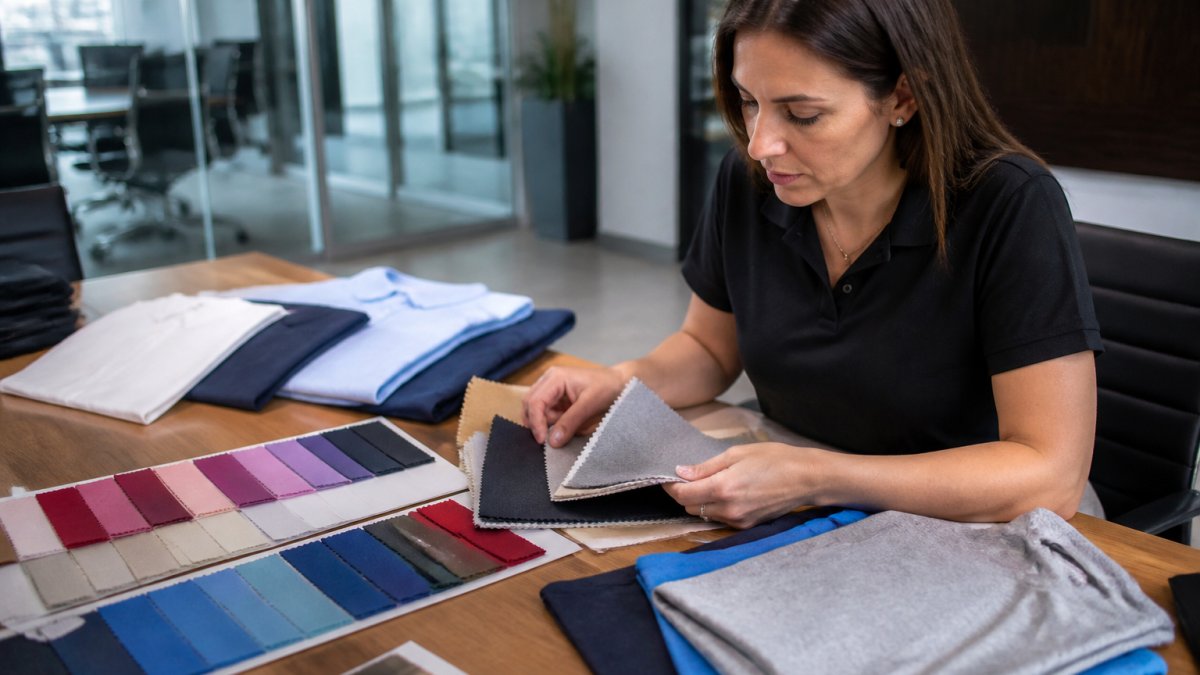
The garment you select is the foundation of your custom apparel. Two main factors matter: fabric composition and fit.
Fabric weight affects durability and comfort. Standard weights range from 5.1 to 6.1 ounces per square yard. Heavier fabrics (6+ ounces) hold up better through repeated washing and wear. For corporate events where people will wear shirts multiple times, choose 6-ounce cotton or cotton-blend options.
Fabric composition determines breathability and shrinkage. Pure 100% cotton is soft and breathable but shrinks more. Cotton blends (90/10 or 50/50 cotton/poly) resist shrinkage and maintain shape better over time. For corporate settings, blends offer better longevity.
Consider these fabric options:
- 100% soft spun cotton
- 90/10 cotton/poly blend
- 50/50 cotton/poly blend
Garment fit matters for professional appearance. Standard unisex cuts work for mixed groups. If your event has a specific dress code or brand identity, consider fitted or relaxed cuts to match your corporate image.
Step 3: Understanding Printing Methods: Screen Printing vs. Direct-to-Garment
Two primary printing methods dominate custom apparel production: screen printing and direct-to-garment (DTG) printing. Each has distinct advantages for different situations.
Screen printing uses mesh screens to apply ink layers. It works best for simple designs with 1-4 colors. The setup cost is higher, but per-unit costs drop significantly on bulk orders. Screen printing produces vibrant, long-lasting color and handles large quantities efficiently. For corporate events with 50+ shirts, screen printing typically offers the best value.
Direct-to-garment (DTG) printing applies ink directly to fabric using inkjet technology. It excels at detailed designs, photo-quality images, and full-color artwork. DTG requires no setup fees, making it ideal for small orders or one-off designs. The trade-off: per-unit costs stay higher, even on bulk orders. DTG works best for orders under 50 shirts or when design complexity demands it.
Here's how to choose:
| Printing Method | Best For | Setup Cost | Per-Unit Cost | Design Complexity |
|---|---|---|---|---|
| Screen Printing | Bulk orders 50+ | Higher | Lower at scale | Simple 1-4 colors |
| Direct-to-Garment | Small orders <50 | None | Higher per unit | Photo-quality, detailed |
At 2mepromo.com, we offer DTG printing on our Customized DTF Shirt with your own logo, which starts at $15.00. This option works well for corporate events where you need quick turnaround and detailed branding without minimum order quantities.

Key Takeaway
DTF printing works for any order size. Choose based on your quantity and design complexity, not just price.
Step 4: Corporate Apparel Design Best Practices
Design quality determines whether your custom t-shirts enhance your brand or cheapen it. Follow these best practices to ensure your design stands out.
Logo placement affects visibility and professionalism. Center chest logos (3-4 inches wide) work for most corporate events. Back neck or sleeve logos add subtle branding. Avoid oversized logos that dominate the shirt, they read as cheap promotional items, not professional apparel.
Color choices must match your brand identity and ensure readability. Test your color choices against your brand guidelines.
File preparation is where most designs fail. Your artwork must be high-resolution (300 DPI minimum) for best results. If you don't have professional design files, work with a designer who understands print requirements.
Typography matters more than most people realize. Sans-serif fonts (Arial, Helvetica) read clearly on apparel. Avoid thin or decorative fonts that lose legibility when printed. Keep text large enough to read from 3 feet away.
Common design mistakes to avoid:
- Placing critical design elements too close to seams or armholes
- Using low-resolution artwork (72 DPI or less)
- Choosing colors that don't contrast with the shirt fabric
- Designing text smaller than 0.5 inches tall
- Forgetting to account for shrinkage when placing designs
If your design files are messy or outdated, 2mepromo.com can help. Our team handles file preparation and design optimization. Upload your logo and text to our DTF Upload image and text product, and we'll size and prepare your image for printing.

Watch Out
Blurry or low-resolution artwork will print blurry. This is the most common complaint about custom apparel quality. Always start with the highest-resolution files available, even if they're from an old designer.
Step 5: How to Size Corporate T-Shirt Orders
Sizing logistics can make or break your corporate event. Get this wrong, and you'll have a pile of unwearable shirts.
Collect sizing data early. Use a simple survey or registration form asking for shirt size. Include a sizing chart with measurements (chest width, length) so people choose correctly. Many people guess their size and end up with poor fits.
Account for size distribution. Most corporate groups follow a bell curve: 5-10% XS, 15-20% S, 25-35% M, 20-30% L, 10-15% XL, 5-10% 2XL+. Adjust based on your specific group. If you're ordering for a fitness company, expect more S and M sizes. For a corporate office, expect more L and XL.
Order a buffer. Always order 10-15% extra in your most common sizes (usually M and L). This covers last-minute additions, fit issues, and replacements for damaged shirts.
Unisex vs. fitted cuts. Unisex cuts fit most people but may look oversized on smaller frames. Fitted cuts (women's or tapered styles) offer better appearance but require more precise sizing. For mixed corporate groups, unisex standard cuts minimize fit complaints.
Customized DTF Shirt with your own logo →
Size distribution planning:
- Survey your group 4-6 weeks before the event
- Request specific measurements, not just size labels
- Order extra in medium and large (your most common sizes)
- Keep 5-10% as replacements for fit issues
Step 6: Bulk T-Shirt Printing Turnaround Time and Custom Logo Embroidery Options
Understanding Turnaround Times and Production Timelines
Turnaround time is how long production takes from order placement to shipment. This is critical for corporate events with firm deadlines, and it directly affects your ability to approve samples and make revisions.
Standard turnaround typically runs 5-10 business days for most custom apparel. This includes design approval, setup, printing, quality control, and packaging. DTG printing often moves faster (3-5 days) since there's no screen setup required. Screen printing takes longer due to the screen preparation process but handles bulk orders efficiently once production starts.
Rush options exist but carry cost premiums. Many printers offer 2-3 day rush production for 25-50% additional cost. Expedited shipping (overnight or 2-day) adds another $50-$200+ depending on package weight and destination. Plan your timeline realistically; relying on rush services is expensive and increases the risk of quality issues.
Factors that extend turnaround:
- Complex designs requiring multiple screens or color separations
- Custom color matching or Pantone specifications beyond standard palettes
- Large order quantities (100+ shirts) that require extended production runs
- Artwork revisions, proof changes, or design file corrections
- Shipping delays to your location, especially during peak seasons (May-August, October-November)
Plan your order 6-8 weeks before your event. This timeline gives you 2-3 weeks for design development and approval, 1-2 weeks for production, and 1-2 weeks for contingency if revisions are needed or shipping delays occur. Never order less than 3 weeks before your event unless you're prepared to pay rush fees and accept higher risk of quality issues.
Budgeting and Cost-Per-Unit Breakdown for Corporate Events
Corporate event planners need a clear cost model to justify apparel spending to finance and executive stakeholders. Here's how to build a realistic budget that accounts for all variables.
Understand the cost components. Your total cost per shirt includes: base garment cost, printing or embroidery cost, design preparation fees (if applicable), shipping, and any applicable taxes. These components scale differently depending on order size and printing method.
Base garment costs typically range from $2.50 to $8.00 per shirt depending on fabric quality and garment style. A standard 6-ounce 100% cotton unisex t-shirt in bulk (50+ units) costs $3.50-$5.00 per unit. Premium fabrics (organic cotton, performance blends, or fitted cuts) cost $5.00-$8.00 per unit. Bulk discounts apply at 50, 100, 250, and 500+ unit thresholds, ordering 100 shirts instead of 50 may reduce per-unit garment cost by 15-20%.
Printing costs vary dramatically by method and design complexity:
- DTG printing: $3.00-$8.00 per shirt depending on design complexity and color coverage. No setup fees. Ideal for orders under 50 units or when design detail justifies the per-unit premium.
- Screen printing: $1.50-$4.00 per shirt for bulk orders, but requires $50-$150 setup fee per color. At 50 shirts, setup cost adds $1.00-$3.00 per unit. At 100 shirts, setup cost adds $0.50-$1.50 per unit. At 250+ shirts, setup cost becomes negligible.
Design preparation and file optimization may cost $0-$75 depending on whether you have print-ready files. If your logo exists only as a low-resolution JPG or PDF, digitization or vector conversion costs $25-$75. Professional design consultation (layout, color matching, font selection) costs $50-$150 if you need guidance.
Shipping costs depend on order weight and destination. A 50-shirt order weighs approximately 15-20 lbs and costs $25-$60 to ship via ground carrier. A 100-shirt order weighs 30-40 lbs and costs $40-$100. Rush or expedited shipping adds $50-$200+.
Sample cost-per-unit calculation example:
Create a cost-justification template for internal stakeholders. Corporate finance teams want to see total cost, per-unit cost, and ROI or business justification. Frame apparel spending as a brand investment, not a commodity expense. For example: "100 custom t-shirts at $7.50 per unit = $750 total investment. At a 3-day conference with 500 attendees, each shirt reaches 5 people on average, resulting in 500 brand impressions per shirt, or 50,000 total impressions for $750 = $0.015 per impression. This compares favorably to digital advertising costs of $0.50-$2.00 per impression."
Negotiate volume discounts strategically. Most suppliers offer tiered pricing at 50, 100, 250, and 500+ unit thresholds. The jump from 50 to 100 units often yields 10-15% savings. The jump from 100 to 250 units yields another 10-15%. If your event has flexibility on quantity, modeling costs at multiple tiers helps you find the optimal order size for your budget.
Key Takeaway
Total cost per shirt = (garment cost + printing cost + design fees + shipping) ÷ quantity. Build this model early and share it with finance stakeholders to secure budget approval before you commit to a supplier.
Custom Logo Embroidery as a Premium Alternative
Embroidery offers a premium alternative to printing, especially for smaller orders or high-end corporate merchandise where durability and perceived quality justify higher per-unit costs.
Embroidery advantages:
- Creates a raised, textured look that feels premium and conveys quality
- Lasts longer than printing through repeated washing and wear cycles
- Works on almost any fabric without color limitations or shrinkage concerns
- Ideal for polo shirts, jackets, structured garments, and executive gifts
- Reads as higher-quality merchandise, reinforcing brand prestige
Embroidery disadvantages:
- Higher per-unit cost ($8.00-$15.00 per shirt depending on design size and stitch count), especially on small orders
- Limited to simpler designs; detailed artwork, photos, and gradients don't embroider well
- Slower production time than DTG printing (7-14 business days typical)
- Requires logo digitization (conversion to embroidery file format), which costs $25-$75 and takes 2-3 business days
- Stitch density and thread color limitations mean some brand colors may not match exactly
When embroidery makes financial sense: Embroidery works best for orders under 25 pieces where you want a professional, lasting impression and can justify higher per-unit cost. For executive gifts, leadership team apparel, or VIP attendee recognition, embroidery delivers superior perceived quality. For larger corporate events (50+ shirts), printing offers better value and faster turnaround. For orders of 100+ units, screen printing dramatically undercuts embroidery on per-unit cost.
Step 7: Place Your Order and Manage Quality Control
Once you've made all your decisions, placing your order correctly prevents problems down the line.
Submission checklist before ordering:
- Final artwork files in vector format (AI, EPS, PDF) or high-resolution raster (300 DPI minimum)
- Confirmed shirt style, color, and fabric weight
- Accurate size breakdown with quantities
- Delivery address and preferred delivery date
- Proof approval (if your printer requires it)
Quality control during production:
- Request a production sample or proof before full printing
- Check design placement and sizing on the actual garment
- Inspect for printing defects, loose threads, or fabric flaws
Upon delivery:
- Inspect the first box for quality, color, and sizing accuracy
- Check that quantities match your order
- Document any damage or defects immediately
At 2mepromo.com, we handle design preparation and quality control for you. Our DTG options start at $15.00 per shirt, and we manage the technical details so your design looks professional. Upload your logo or artwork, and we'll optimize it for printing.
Key Takeaway
Approval and inspection prevent costly mistakes. Always request a proof or sample before committing to full production, especially on your first order.
Conclusion
Understanding how to order custom t-shirts for corporate events requires planning across design, sizing, printing, and logistics. The difference between apparel that builds your brand and merchandise that looks cheap comes down to choosing the right fabric weight, understanding your printing options, and managing the timeline properly. At 2mepromo.com, we handle the technical complexity, from design file preparation to quality control, so your brand looks professional. Our DTF printing services start at $15.00 per shirt, giving you flexibility on order size and design complexity. Get started with 2mepromo.com and deliver custom apparel your team will actually want to wear.
Frequently Asked Questions
How far in advance should I place a custom apparel order for a corporate event?
Plan to order custom t-shirts at least 4-6 weeks before your event. This timeframe allows for design approval, production, and any necessary adjustments. If you need rush shipping or expedited production, communicate that when placing your order, some vendors offer faster turnaround options, though these may carry additional costs. For bulk t-shirt printing, earlier ordering ensures better quality control and reduces the risk of delays affecting your event.
What file formats are required for high-quality logo printing on custom t-shirts?
If you only have a raster file (JPG, PNG), ensure it's at least 300 DPI and high-resolution. Poor file quality leads to blurry logos and faded prints, so verify your files meet production standards before submitting.
What are the benefits of using custom logo embroidery versus screen printing?
Custom logo embroidery creates a premium, three-dimensional look that lasts longer through repeated washing and wear, ideal for uniforms and high-visibility apparel. Screen printing offers vibrant full-color designs at lower costs per unit for bulk orders and works better for detailed, photo-realistic logos. Embroidery suits smaller logos and simpler designs; screen printing handles complex artwork. Consider your budget, design complexity, and how long you need the apparel to maintain its appearance when choosing between these methods.
How much does it cost to order custom t-shirts for a corporate event?
Custom t-shirt pricing depends on order quantity, fabric quality, printing method, and design complexity. DTF printed shirts start at $15 per unit. Request a detailed quote that breaks down per-unit costs and any additional charges to accurately budget for your corporate event.
- Choosing a selection results in a full page refresh.
