Your cart is empty
Looks like you haven't added anything to your cart yet







Custom Tent Printing for Outdoor Events: A 2026 Guide
Table of Contents
- Why Custom Tent Printing Matters for Your Event
- Dye-Sublimation vs Screen Printing for Canopies
- Custom Canopy Tent Design Best Practices
- 10x10 Pop Up Tent Printing Cost and Options
- How to Set Up a Branded Pop Up Tent
- Tent Sizes, Materials, and Weather Resistance
- Maintenance and Long-Term Care for Printed Tents
- Measuring ROI and Marketing Impact
Last Updated: August 29, 2026
Why Custom Tent Printing Matters for Your Event
Custom tent printing transforms a standard shelter into a powerful brand activation tool. A professionally branded canopy draws attention, communicates your message instantly, and creates a professional backdrop for engagement. For government agencies, small businesses, and event coordinators, this visibility translates directly into foot traffic, meaningful conversations, and stronger brand recall.
At 2mepromo.com, we've worked with procurement officers, marketing managers, and event teams who consistently reported higher engagement and lasting brand impact. The key is knowing how to do it right: choosing the right printing technology, designing graphics that work at distance, selecting durable materials, and executing setup properly.
Key Takeaway
A branded [canopy tent](/products/10ft-custom-canopy-tent-5e2551d1-adb8-41f8-ade1-8f3bb3e8565a) is one of the highest-ROI investments an organization can make for outdoor events. It combines visibility, professionalism, and portability in a single asset that works harder than almost any other promotional item.
Dye-Sublimation vs Screen Printing for Canopies
Your choice of printing method determines color vibrancy, durability, cost, and long-term appearance.
Dye-sublimation printing is the gold standard for custom canopy tents. The process infuses dye directly into the fabric at the molecular level, creating colors that become part of the material. This means no cracking, peeling, or fading, even after repeated sun, rain, and wind exposure. Gradients, photographic images, and complex multi-color designs all render with stunning clarity.
Screen printing applies ink as a layer on top of the fabric. It works for simple, bold designs with limited colors, but the ink cracks if the fabric flexes and fades faster under UV exposure. For outdoor event use where your tent will be packed, unpacked, and exposed to weather repeatedly, screen printing doesn't hold up.
A dye-sublimated custom tent will look sharp and vibrant after your first event and still look professional two years later. Given that a quality canopy is a multi-year investment, dye-sublimation is the smarter choice.
Pro Tip
Request high-resolution artwork (at least 150 DPI) for dye-sublimation printing. The technology can handle intricate detail, and your graphics will look noticeably sharper than anything screen printing can deliver.
Custom Canopy Tent Design Best Practices
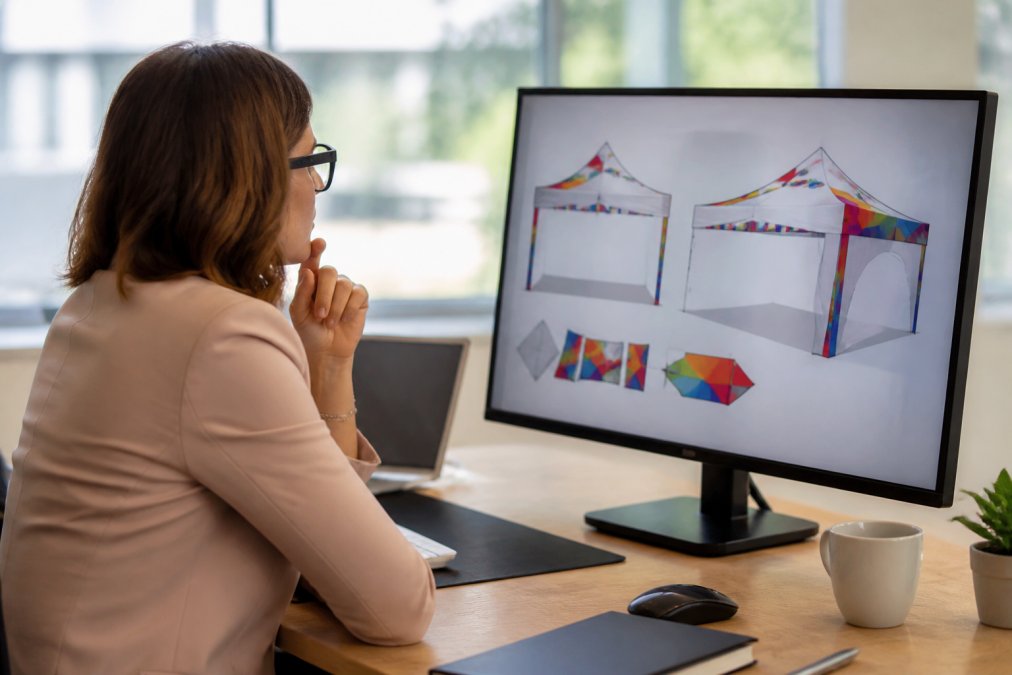
Designing graphics for a custom tent requires a different mindset than designing for print or digital screens. Your audience will view your tent from 20 feet away, often in bright sunlight. Your design needs to work at distance, communicate instantly, and maintain visual impact even when partially shaded.
Artwork Submission and File Requirements
Start with vector files whenever possible. Vector graphics, created in Adobe Illustrator or similar software, scale infinitely without quality loss. If you only have raster images (JPEGs, PNGs), they need to be at least 150 DPI at the final print size. A 10x10 tent canopy top is roughly 120 inches across, so your raster file needs significant resolution to avoid pixelation.
Provide files in RGB (not CMYK), as dye-sublimation works in the RGB color space. Include bleed area in your design, extra space beyond the final trim line, typically 0.5 inches on all sides, to prevent white edges if the graphic shifts during cutting.
Color, Resolution, and Visual Impact
Bright, saturated colors read better from distance than pastels or muted tones. Deep blues, vibrant reds, and bold greens with strong contrast between text and background ensure readability from across a crowded event space.
At 150 DPI, fine detail remains sharp and legible. Test your design mockup at actual viewing distance if possible. Pull up your design on a large screen and step back 20 feet. Can you read the text? Does the logo stand out?
10x10 Pop Up Tent Printing Cost and Options
A 10x10 pop-up tent is the standard for most outdoor events, trade shows, and promotional activations. It's large enough to create real visual presence, portable enough to transport in a vehicle, and affordable enough that most organizations can justify the investment.
At 2mepromo.com, the 10ft Custom Canopy Tent with dye-sublimated graphics starts at $520.60 with free ground shipping and ships in 3 business days. If you need something larger, the 20 ft Casita Air Canopy Tent at $1,072.71 provides significantly more printable surface area and ships in 4 business days.

The pricing reflects what you're actually getting: professional dye-sublimation printing, weather-resistant fabric, a frame engineered to handle repeated setup and takedown, and a carry bag for transport. A quality custom tent printing investment looks professional, holds up to weather and repeated use, and becomes a reusable asset that pays for itself through multiple events.
Watch Out
Avoid the temptation to go with the absolute cheapest option available. Budget tents often use thin fabrics that fade quickly, frames that fail after a few setups, and printing that cracks or peels within months. Invest once in quality.
How to Set Up a Branded Pop Up Tent
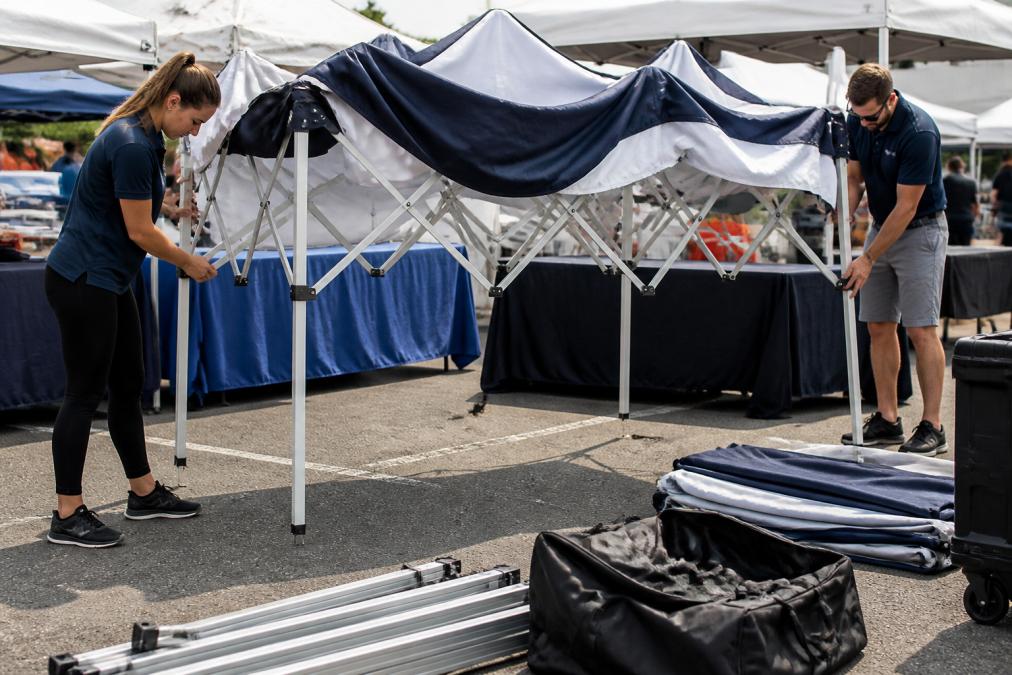
Setup speed is one of the biggest advantages of a pop-up canopy. A 10x10 tent can go from carry bag to fully assembled in 5-10 minutes with two people.
Assembly and Telescopic Legs
Start by laying out the tent frame on a flat surface. Pull each telescopic leg straight down until it locks into place. Once all four legs are extended and locked, have a second person help you lift the canopy top into position. Secure the canopy top to the frame by attaching the corner straps or clips, ensuring they're tight so the canopy doesn't flap in wind.
Check that the tent is level. If you're on uneven ground, adjust the telescopic legs individually until the canopy sits flat.
Securing Your Tent in Wind and Weather
A properly anchored tent is a safe tent. Use weighted bases or sandbags at each leg, typically 40-50 pounds each. This is essential, not optional. If you're on grass or soft ground, use stakes or ground anchors as additional security.
Check wind conditions throughout your event. If wind picks up unexpectedly, add additional weights or move the tent to a more sheltered location. In heavy rain, ensure water drains properly away from the tent. The fabric is water-resistant, not waterproof, so prolonged heavy rain can eventually seep through.
Tent Sizes, Materials, and Weather Resistance
A 10x10 tent is the workhorse size. It's large enough to accommodate a small table, a couple of chairs, and 3-4 people comfortably. For most trade shows, county fairs, and outdoor promotional events, 10x10 is the sweet spot.
If you need more space, a 20x10 tent doubles your footable area, allowing for multiple display tables or product demonstrations.
The fabric matters as much as the frame. Weather-resistant material, typically a heavy-duty polyester blend, sheds water and resists UV fading. The dye-sublimation process bonds color into this fabric at the molecular level, so UV exposure doesn't fade the graphics the way screen-printed or vinyl-applied graphics would. Fire-retardant treatment is standard on quality event tents, meeting industry standards for flame resistance.
Maintenance and Long-Term Care for Printed Tents
A quality custom tent printing investment will last 3-5 years or longer with proper maintenance. Most damage comes from poor storage or neglect, not from normal event use.
After each event, inspect the tent for debris, dirt, or moisture. Wipe down the frame with a dry cloth. If the fabric is wet or damp, let it air dry completely before packing it away. Never store a wet tent, as moisture promotes mildew.
For routine cleaning, use a soft brush or microfiber cloth with mild soap and lukewarm water. Avoid harsh chemicals or abrasive scrubbing. Store the tent in a cool, dry place away from direct sunlight when not in use. Check the frame periodically for loose bolts or bent components, and patch small tears promptly with a fabric repair kit.
Measuring ROI and Marketing Impact
Count foot traffic to your booth. A well-designed tent typically increases booth engagement by drawing attention and creating a defined, professional space that invites interaction.
Track conversations and leads. Did you collect more business cards, email addresses, or qualified leads at events where you used a branded tent versus events without one?
Measure brand recall. After an event, survey attendees about which booths they remember. Organizations with branded tents consistently report higher recall rates than those with generic setups.
The cost of a quality custom tent printing setup from 2mepromo.com, $520 to $1,072 depending on size, typically pays for itself through increased engagement and leads within 2-3 events. After that, it's pure ROI on every subsequent use.
Custom tent printing is one of the most underutilized tools in event marketing. A professionally branded canopy tent transforms an ordinary event booth into a visual asset that works for you before, during, and after the event. At 2mepromo.com, we've helped government agencies, small business owners, and event coordinators create branded outdoor experiences that drive engagement and strengthen brand identity. Our custom canopy tents feature dye-sublimation printing that delivers vivid, long-lasting graphics, weather-resistant fabrics engineered for durability, and fast turnaround times. Get started with 2mepromo.com and turn your next outdoor event into a branded activation that attendees actually remember.
| Tent Size | Starting Price | Best For | Turnaround |
|---|---|---|---|
| 10x10 Pop-Up Tent | $520.60 | Trade shows, small events | 3 business days |
| 20x10 Canopy Tent | $1,072.71 | Large booths, maximum visibility | 4 business days |
| 10ft Backwall | $140.00 | Enhanced booth backdrop | 3 business days |
Frequently Asked Questions
How much does it cost to make a custom 10x10 tent?
A 10x10 custom canopy tent with dye-sublimation printing starts at $520.60 and includes the tent frame, printed canopy top, and carry bag. Larger sizes like 20x10 tents run $1,072.71. Most orders ship in 3-4 business days with free ground shipping on graphic packages.

What is the difference between dye-sublimation and screen printing for tents?
Dye-sublimation uses heat to bond ink directly into fabric fibers, producing full-color, high-resolution graphics with vivid detail and no color limits. Screen printing applies ink in layers and works best for simple designs with 1-3 colors. Dye-sublimation delivers superior durability, UV protection, and weather resistance, making it the standard for branded outdoor event tents.
How do I maintain and clean a custom printed canopy?
Wipe dye-sublimated tent fabric with a soft, damp cloth and mild soap to remove dust and light stains. Avoid harsh chemicals or abrasive scrubbing, which can fade graphics. Allow the tent to air dry completely before packing it away. Store in the included carry bag in a cool, dry place. Inspect the frame for rust or damage before each event, and check for mold or mildew if stored in humid conditions.
What file formats are required for high-quality tent printing?
Submit vector files (AI, EPS, PDF) or high-resolution raster files (150 DPI is standard for tent graphics). Ensure artwork includes bleed margins and uses RGB color mode. If you don't have design files ready, 2mepromo.com's team can often help prepare artwork from existing logos or sketches.
This article was written using GrandRanker
- Choosing a selection results in a full page refresh.
