Your cart is empty
Looks like you haven't added anything to your cart yet







How to Prepare Artwork for Promotional Products
Table of Contents
- Why Artwork Preparation Matters for Promotional Products
- Vector vs. Raster Files for Printing
- Best File Formats for Promotional Products
- Color Modes and Pantone Color Matching for Promotional Items
- Resolution, DPI, and Bleed Requirements
- Print-Ready File Checklist
- Common Mistakes to Avoid When Preparing Artwork
- Handling AI-Generated and Mobile Artwork
- Making the Final Submission
- Frequently Asked Questions
Last Updated: September 3, 2026
Why Artwork Preparation Matters for Promotional Products
Poorly prepared artwork results in pixelated logos, color shifts, misaligned text, or prints that fade quickly. The difference between a file that prints beautifully and one that fails comes down to decisions made before design reaches the printer.
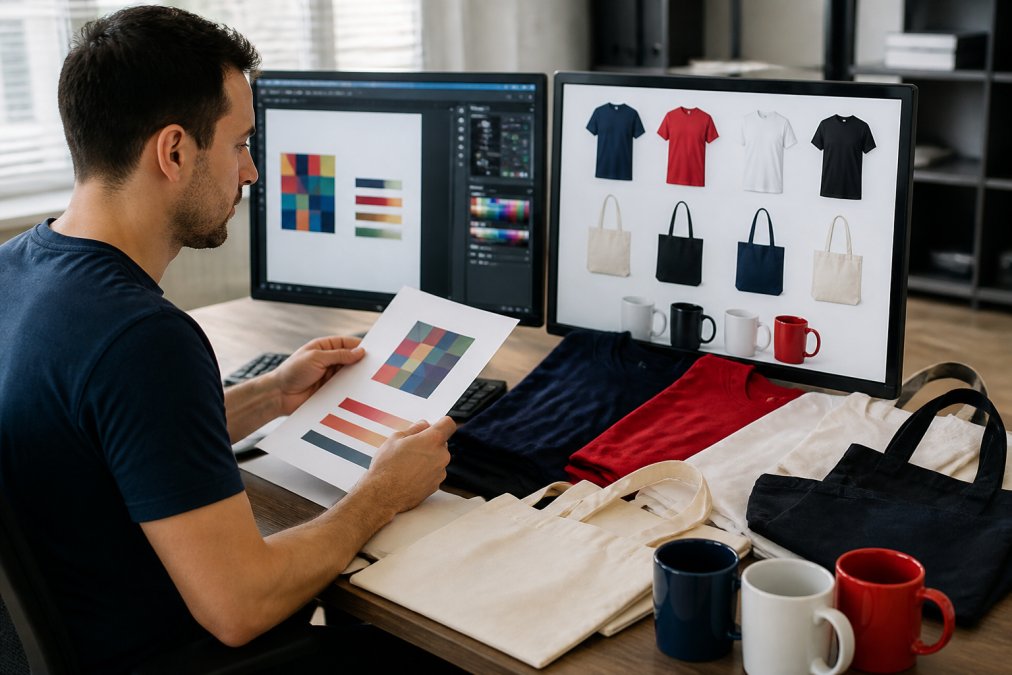
At 2mepromo.com, proper artwork preparation prevents costly mistakes. When clients submit unprepared files, we catch issues before production, but that delays your order. The goal is getting it right the first time by understanding what print-ready actually means.
Artwork must work across different printing methods: screen printing on apparel, embroidery on caps, laser engraving on awards, or full-color printing on signage. Each method has different file format needs, color mode requirements, and resolution standards.
This guide covers every step of preparing artwork that prints cleanly, maintains color accuracy, and scales properly across promotional items.
Pro Tip
Before submitting any artwork, ask yourself: "Could I hand this file to any professional printer and have them print it without asking questions?" If the answer is no, it needs more work.
Vector vs. Raster Files for Printing
Understanding the difference between vector and raster images determines whether your logo looks crisp at any size or pixelates when enlarged.
Vector graphics are built from mathematical equations that describe lines, curves, and shapes. When you scale a vector image, the software recalculates the equations, keeping the image sharp at any size. Adobe Illustrator, CorelDRAW, and Affinity Designer create vector files. Vector graphics are ideal for logos, text, and any design element needing enlargement without quality loss.
Raster images are made of pixels arranged in a grid. Photographs are raster. A logo saved as JPG or PNG is raster. Enlarging a raster image stretches existing pixels, causing pixelation and blurriness. Raster images have fixed resolution; larger sizes require higher-resolution versions.
For promotional products, logos and text must always be vector. Photographs and complex artwork can be raster, but at high resolution (at least 300 DPI). If your logo is currently PNG or JPG, convert it to vector format before submitting for production.
Many designers create logos in vector but export them as raster for web use. When you need that logo for promotional products, you need the original vector file, not the web-sized image. If your designer no longer has it, have the logo redrawn in vector format.
Watch Out
Scaling up a raster image doesn't make it print-ready. Always start with vector files for logos and design elements printed at different sizes.
Best File Formats for Promotional Products
Different printing methods accept different formats, and some preserve quality better than others.
PDF is the gold standard for print files. PDF preserves fonts, colors, and layout exactly as designed and works across Windows and Mac systems without compatibility issues. Most printers prefer PDF because it's predictable and reliable. When saving a PDF for print, ensure fonts are outlined and the color mode is correct.
AI files (Adobe Illustrator) are vector files that preserve editability. Many printers accept AI files directly, but PDF is safer because it locks the design. If submitting an AI file, outline all fonts before sending.
EPS files (Encapsulated PostScript) are older vector format files still used in professional printing. EPS files can store both vector and raster data, making them versatile for complex designs.
PNG and JPG are raster formats suitable for photographs and complex artwork, but NOT for logos or text-heavy designs. If using raster files, ensure they're 300 DPI or higher. Never submit web-sized images (72 DPI) for printing.
TIFF files are high-quality raster files often used for photographs in professional printing and preserve more quality than JPG.
The safest approach: convert your design to PDF before submitting. This locks everything in place and eliminates format compatibility issues. 2mepromo.com accepts PDF, AI, and EPS files.
Color Modes and Pantone Color Matching for Promotional Items
Your artwork must be in the correct color mode for the printing method. The printing industry uses three main color systems.
CMYK (Cyan, Magenta, Yellow, Black) is the standard for full-color printing on apparel, tote bags, mugs, and most promotional items. If your artwork was designed in RGB, it must be converted to CMYK before printing. The conversion can shift colors slightly, reds may become more orange, blues may shift toward purple.
RGB (Red, Green, Blue) is for screen displays only. Any design created in RGB must be converted to CMYK before production. This is one of the most common mistakes: submitting an RGB file and expecting colors to match the screen.
Pantone Matching System (PMS) is used when color accuracy is critical. Instead of relying on CMYK combinations, Pantone colors are premixed inks matching a specific color standard. If your brand has a specific Pantone color for your logo, specify that PMS number. However, not all printing methods support Pantone colors; screen printing does, but digital printing typically uses CMYK.
CMYK printing won't perfectly match your screen or a Pantone swatch. If precise color matching is essential, 2mepromo.com offers a [PMS Color Match service(/products/pms-color-match-per-color-75875122-522e-45c3-94da-e5ef6d92fdae) | https://2mepromo.com/products/pms-color-match-per-color-75875122-522e-45c3-94da-e5ef6d92fdae] that adjusts CMYK values to match your Pantone specification. This service costs $38.46 per color and is recommended for color-critical projects.

Key Takeaway
Convert your artwork to CMYK before submitting. If your brand uses specific Pantone colors, include the PMS number and consider a color match service for accuracy.
Resolution, DPI, and Bleed Requirements
Resolution determines print quality. DPI (dots per inch) measures how much detail the printer can reproduce.
300 DPI is the minimum standard for print quality (printing.org). At 300 DPI, the human eye cannot detect individual dots, and the image appears smooth and sharp (peer-reviewed research). Anything lower will look pixelated or blurry. For logos and text, 300 DPI is non-negotiable.
To calculate if your image has sufficient resolution, multiply print dimensions by DPI. If your design prints at 4 inches wide using 300 DPI, the image file should be at least 1,200 pixels wide (4 × 300).
Bleed is extra space beyond the trim edge ensuring color extends all the way to the edge of the final product. If your design has a background color or image reaching the edge, you need bleed. Standard bleed is 0.125 inches (1/8 inch) beyond the trim line (printing.org).
Trim marks show the printer where to cut the final product. If your design includes bleeds, trim marks are essential.
Margins are the safe area where critical content must stay. Leave at least 0.25 inches from the edge for important design elements.
Print-Ready File Checklist
Before submitting artwork, work through this checklist:
File Format & Setup:
- File is in PDF, AI, or EPS format (not JPG, PNG, or web-sized image)
- File name is descriptive without special characters
- All layers are flattened or properly organized
- No embedded links or external dependencies
Color & Image Quality:
- Artwork is in CMYK color mode (not RGB)
- All images are 300 DPI or higher
- Logos are vector format (not raster/pixelated)
- Color accuracy is verified
- If using Pantone colors, PMS numbers are specified
Layout & Sizing:
- Design dimensions match the final product size
- Bleed area is included (0.125 inches beyond trim edge)
- Trim marks are visible
- No critical content within 0.25 inches of the edge
- Text is at least 8 points for readability
Fonts & Text:
- All fonts are outlined or embedded (not linked)
- Text contrast is sufficient
- Special characters display correctly
- Spell-check is complete
Technical Details:
- Color profile is embedded
- No transparency or drop shadows that may not print correctly
- Stroke weights are appropriate for the printing method
- File size is reasonable (under 100 MB)
If unsure whether your file meets these standards, 2mepromo.com offers a [Hard Copy Proof(/products/hard-copy-proof-1-7bc5ae3b-8216-4c64-84ff-30723c5351fb) service | https://2mepromo.com/products/hard-copy-proof-1-7bc5ae3b-8216-4c64-84ff-30723c5351fb] for $61.54. This produces a small-scale printed sample showing exactly how your design will look, catching issues before full production. Hard copy proofs ship in 1-2 business days.

Pro Tip
Use the hard copy proof service if this is your first time ordering custom promotional items. It's cheap insurance against a costly reprint.
Common Mistakes to Avoid When Preparing Artwork
Most printing problems stem from preventable mistakes.
Submitting RGB files instead of CMYK. This is the single most common error. RGB looks vibrant on screen but prints dull or with color shifts. Always convert to CMYK before submitting.
Using low-resolution images. A 72 DPI image from the web looks fine on screen but prints blurry. Always check image resolution before using it in a design.
Forgetting to outline fonts. If you send a PDF with embedded fonts the printer doesn't have installed, text may render incorrectly. Always outline your fonts before exporting to PDF. In Adobe Illustrator, select all text, then go to Type > Create Outlines.
Scaling raster logos. A small logo saved as JPG doesn't become high-quality when enlarged. If you need a larger logo, you need the vector original or a higher-resolution raster version.
Ignoring bleed and trim requirements. A background color stopping at the edge will show a white line after trimming. Always include bleed if your design extends to the edge.
Using thin strokes for screen printing. Screen printing requires minimum stroke weights (usually 2-3 points) to print cleanly. Thin lines may disappear.
Not accounting for fabric or material color. A light gray design on dark navy requires different color thinking than the same design on white. Consider how the base color affects your design.
Submitting artwork without checking spelling. Typos in promotional items are permanent and embarrassing. Have someone else review before submitting.
Handling AI-Generated and Mobile Artwork
AI-generated images from tools like DALL-E, Midjourney, and Stable Diffusion are raster files, not vector. They cannot be enlarged significantly without quality loss.
If using AI artwork for large prints, generate the image at the highest resolution available. Most AI tools offer 2K, 4K, or higher resolution options.
AI-generated logos are problematic because logos need to scale from business card size to billboard size. Export at maximum resolution, then have a designer convert it to vector format.
Mobile-first artwork submission is becoming common. If submitting artwork created on a mobile device, verify the final file at actual size on a desktop. Mobile screens are small and can mask resolution issues.
For mobile tools like Canva or Adobe Express, export in the highest quality available, convert to CMYK, and verify 300 DPI resolution. Many mobile apps default to screen resolution, requiring manual adjustment.
If uncertain whether AI-generated or mobile-created artwork is print-ready, submit it with a test order or request a hard copy proof first.
Watch Out
AI-generated artwork cannot be enlarged indefinitely. If you need a logo at multiple sizes, have it converted to vector format by a designer. Raster upscaling always results in quality loss.
Making the Final Submission
Once your artwork is prepared, include a brief document specifying:
- Product name and quantity
- Printing method (screen printing, embroidery, digital print, laser engraving, etc.)
- Print location (front left chest, back neck, etc.)
- Any special color requirements or Pantone numbers
- Deadline date
When you order through 2mepromo.com, our team reviews your files and flags any issues before production begins. If something needs adjustment, we'll contact you with specific feedback rather than proceeding with a potentially flawed file.

For complex orders or if uncertain about file preparation, our team can guide you through the process.
Preparing artwork correctly is the difference between promotional items that represent your brand professionally and those that look hastily made. The technical requirements, vector files, CMYK color mode, 300 DPI resolution, proper bleed, exist because printers have learned through decades of production what works and what fails. Following these standards ensures your logos stay crisp, colors match your brand, and your promotional items arrive looking exactly as intended. At 2mepromo.com, we're here to help you get it right the first time, with services like hard copy proofs and color matching to verify your files before production. Start with the checklist above, and your artwork will be ready to print.
Frequently Asked Questions
What file formats are best for promotional product printing?
Vector formats like AI, EPS, and PDF are ideal because they scale without quality loss. For raster images, use high-resolution TIFF or PNG files at 300 DPI minimum. PDF is versatile and preserves fonts and colors reliably. Avoid JPG for print unless it's your only option, compress it at high quality (90%+). Always provide files in CMYK color mode, not RGB, to ensure accurate printing on promotional products.
Why does my logo need to be in a vector format for printing?
Vector graphics use mathematical formulas to define shapes, so they scale infinitely without pixelation or quality loss. Your logo might appear on a small embroidered polo shirt or a large trade show banner, vector ensures it looks sharp at any size. Raster images (JPG, PNG) are made of fixed pixels; enlarging them causes blurring and jagged edges. For professional promotional items, vector is non-negotiable for logo integrity and brand consistency.
How do I ensure my brand colors look accurate on promotional items?
Use Pantone Matching System (PMS) color references in your design file. Most promotional printing uses CMYK inks, which don't always match PMS colors perfectly. 2mepromo.com offers PMS Color Match service ($38.46 per color) to bridge that gap, our team adjusts CMYK values to match your Pantone specs as closely as possible. Provide PMS numbers in your artwork file and request a hard copy proof ($61.54) to verify color accuracy before full production.
What should I include in a print-ready file checklist?
Check that your file is in vector format (AI, EPS, PDF) or high-resolution raster (TIFF, PNG at 300 DPI). Set color mode to CMYK with all fonts outlined or converted to curves. Include 0.125-inch bleed area on all sides and trim marks. Flatten all layers and remove transparency. Verify image resolution and ensure no linked files are missing. Remove any RGB images or spot colors unless specified. Save as PDF or native format and test the file in Adobe Illustrator or your design software before submission.
This article was written using GrandRanker
- Choosing a selection results in a full page refresh.
